Mountain Photography Tips - Part 1

Shooting the Patagonian landscape on the summit of Cerro Standhart- I carried a full frame DSLR and two lenses on the whole climb. © Will Sim
Like many ‘pros’ out there, I’m a self taught photographer- after all photography itself is not that complicated. Over the years I’ve become a lot more efficient at capturing the outdoors but my style has never changed, and I guess that’s important- everyone has their own style and that’s not something that should be force fed. But underneath every personal taste there are always going to be universal ‘laws’ and tricks that photographers use to make great images. Some may seem basic and others a bit alien but hopefully there is something in here for everyone because at the end of the day these are just tips to shoot what I want to shoot, and you have to adapt them to your vision and your adventure.
Rule of Thirds
Possibly the least exciting thing to start with but also the most important. The Rule of Thirds dictate that you should try and break up your images in to rough thirds- did you ever take a landscape photo with the horizon at mid height (a natural thing to do) only to get home and think it was lacking? Well the Rule of Thirds says that the sky should have only taken up a third of the photo, the background the middle third, and the foreground the lower third. Nowadays digital cameras can help you out a bit and you can select to always see a ‘thirds grid view’ on your view finder- try it it will make all the difference. It will also help you keep that horizon straight.
As you’ll see in the examples below it’s important not to be too anal about it - I’ve purposely included images that don’t follow the exact Rule of Thirds just to show that it’s good to allow yourself a bit of artistic licence.

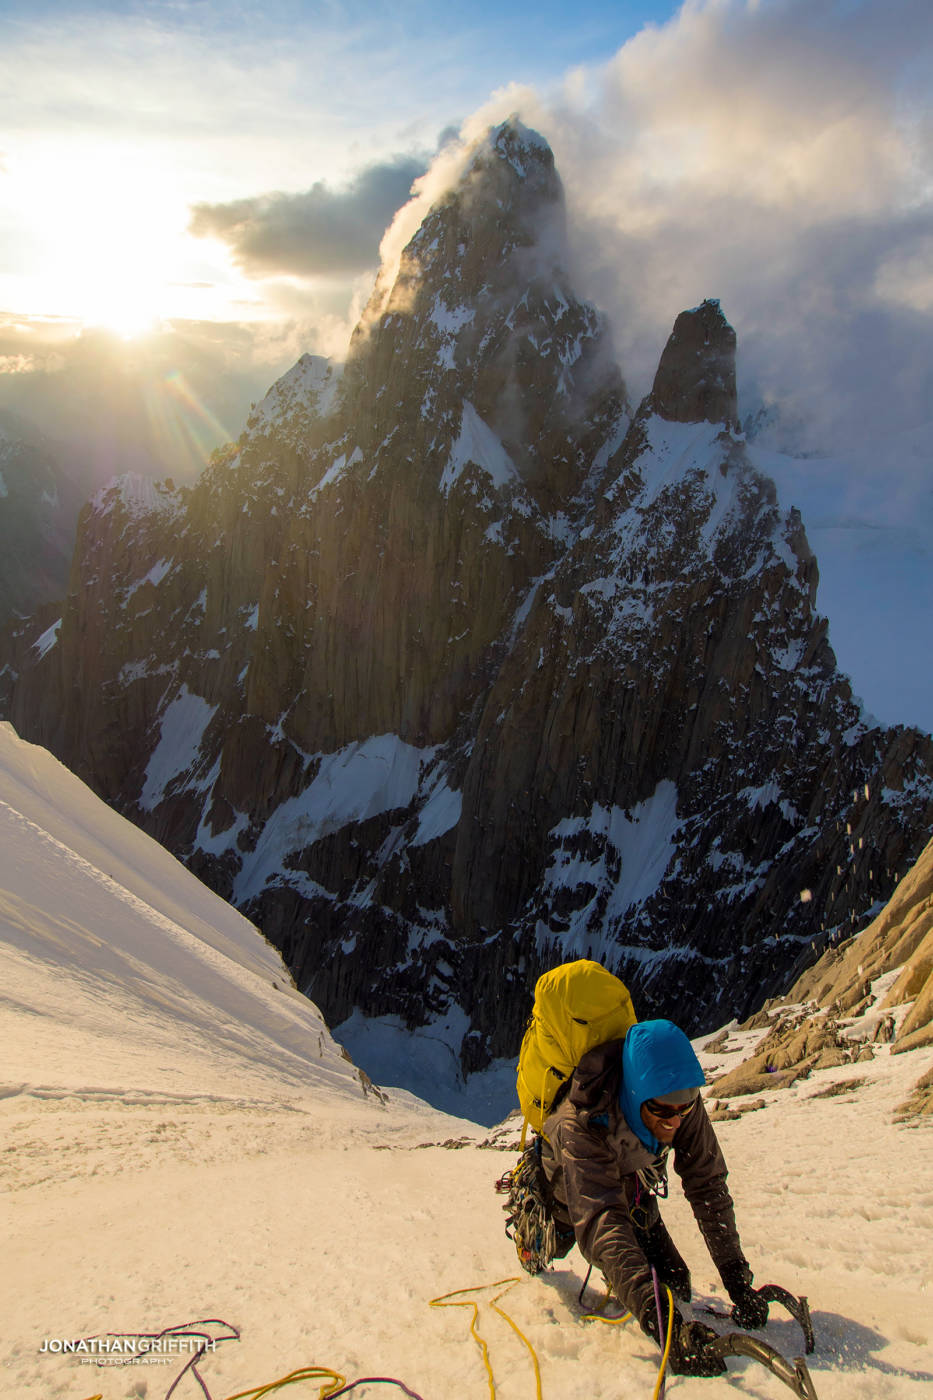
An almost perfect Rule of Thirds: The lower third shows the subject and foreground, the middle third takes in the mountain backdrop, and the upper third takes in the sky
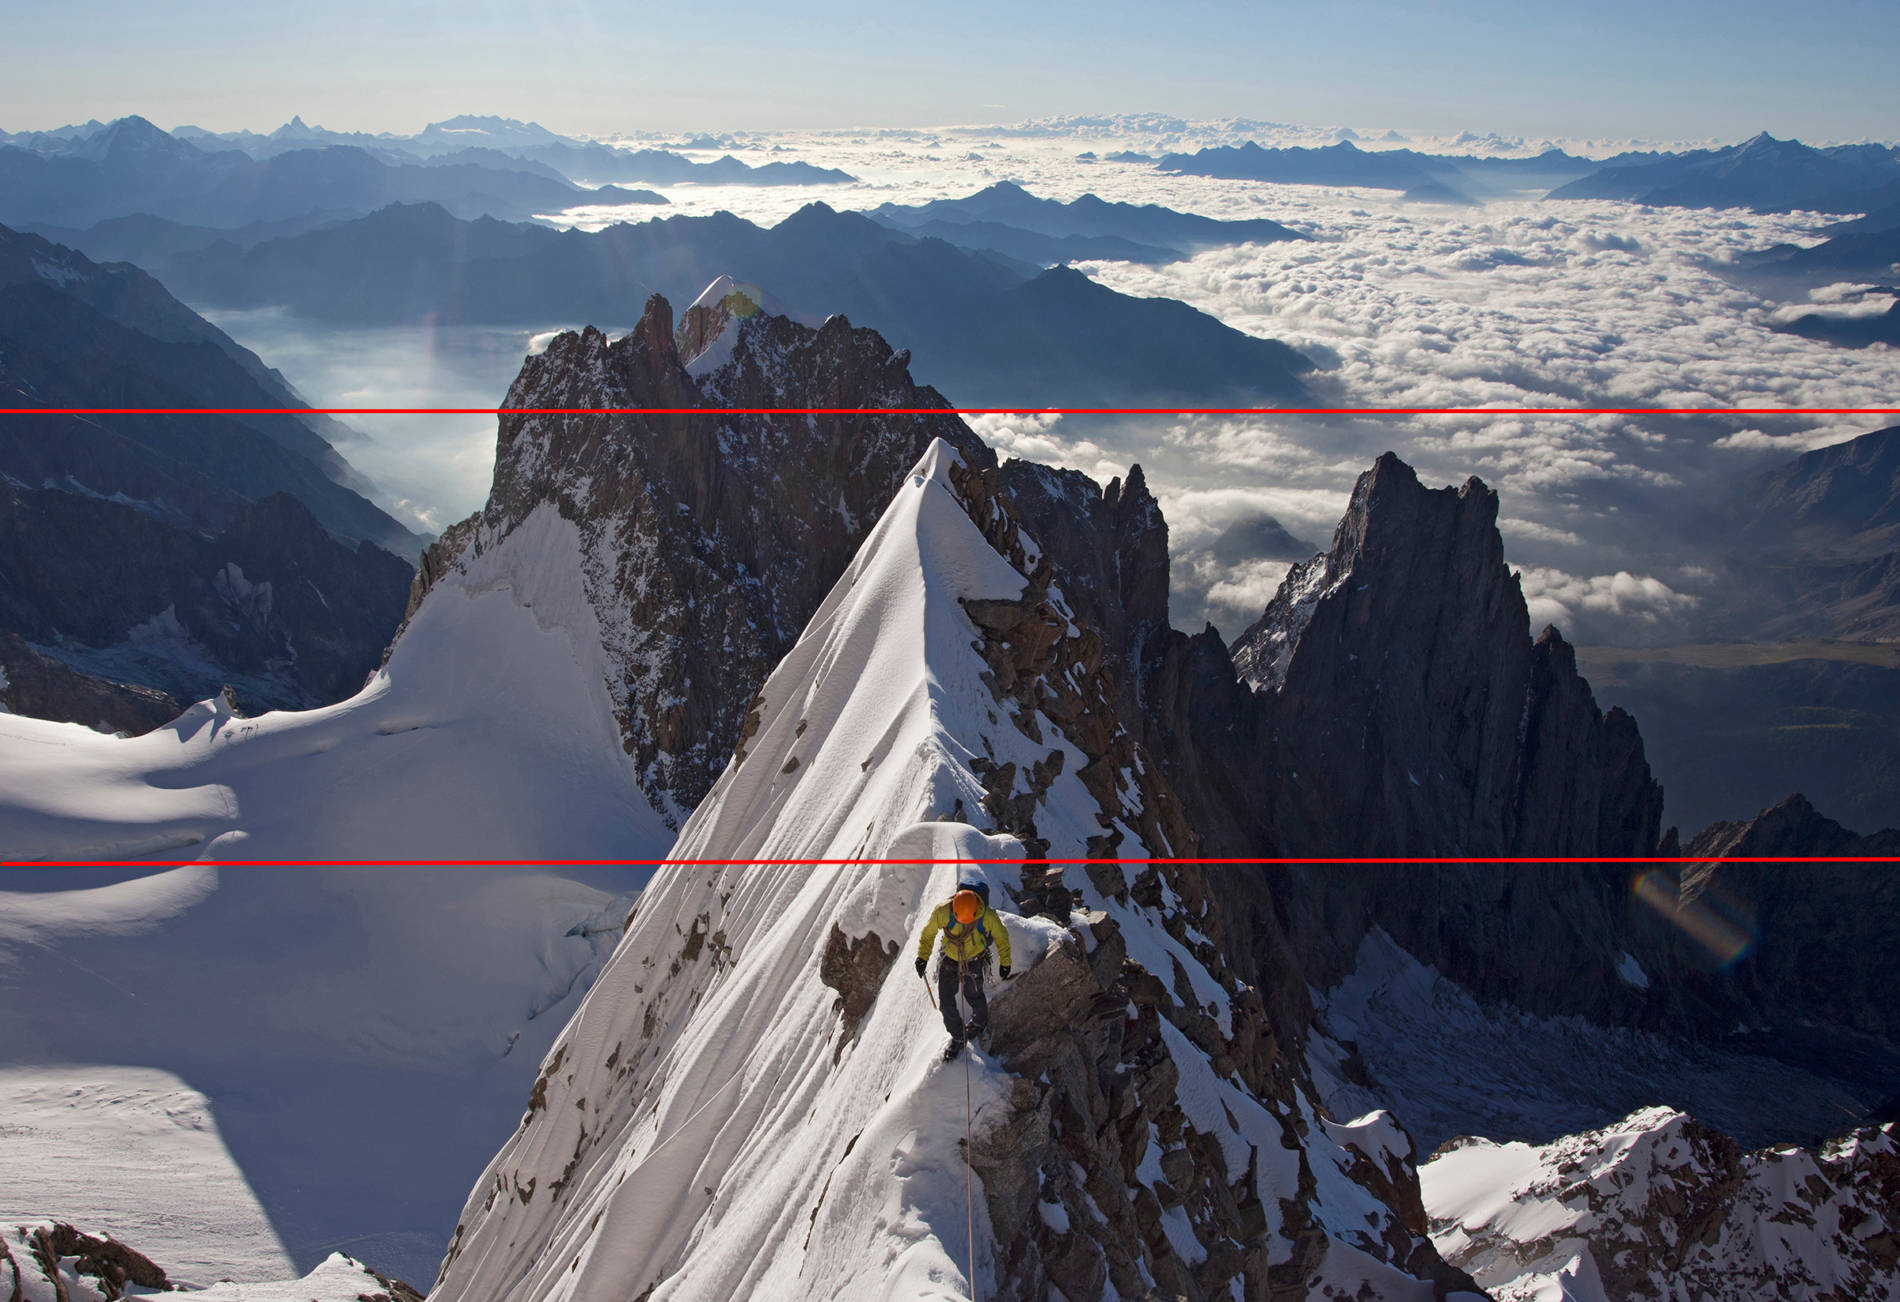
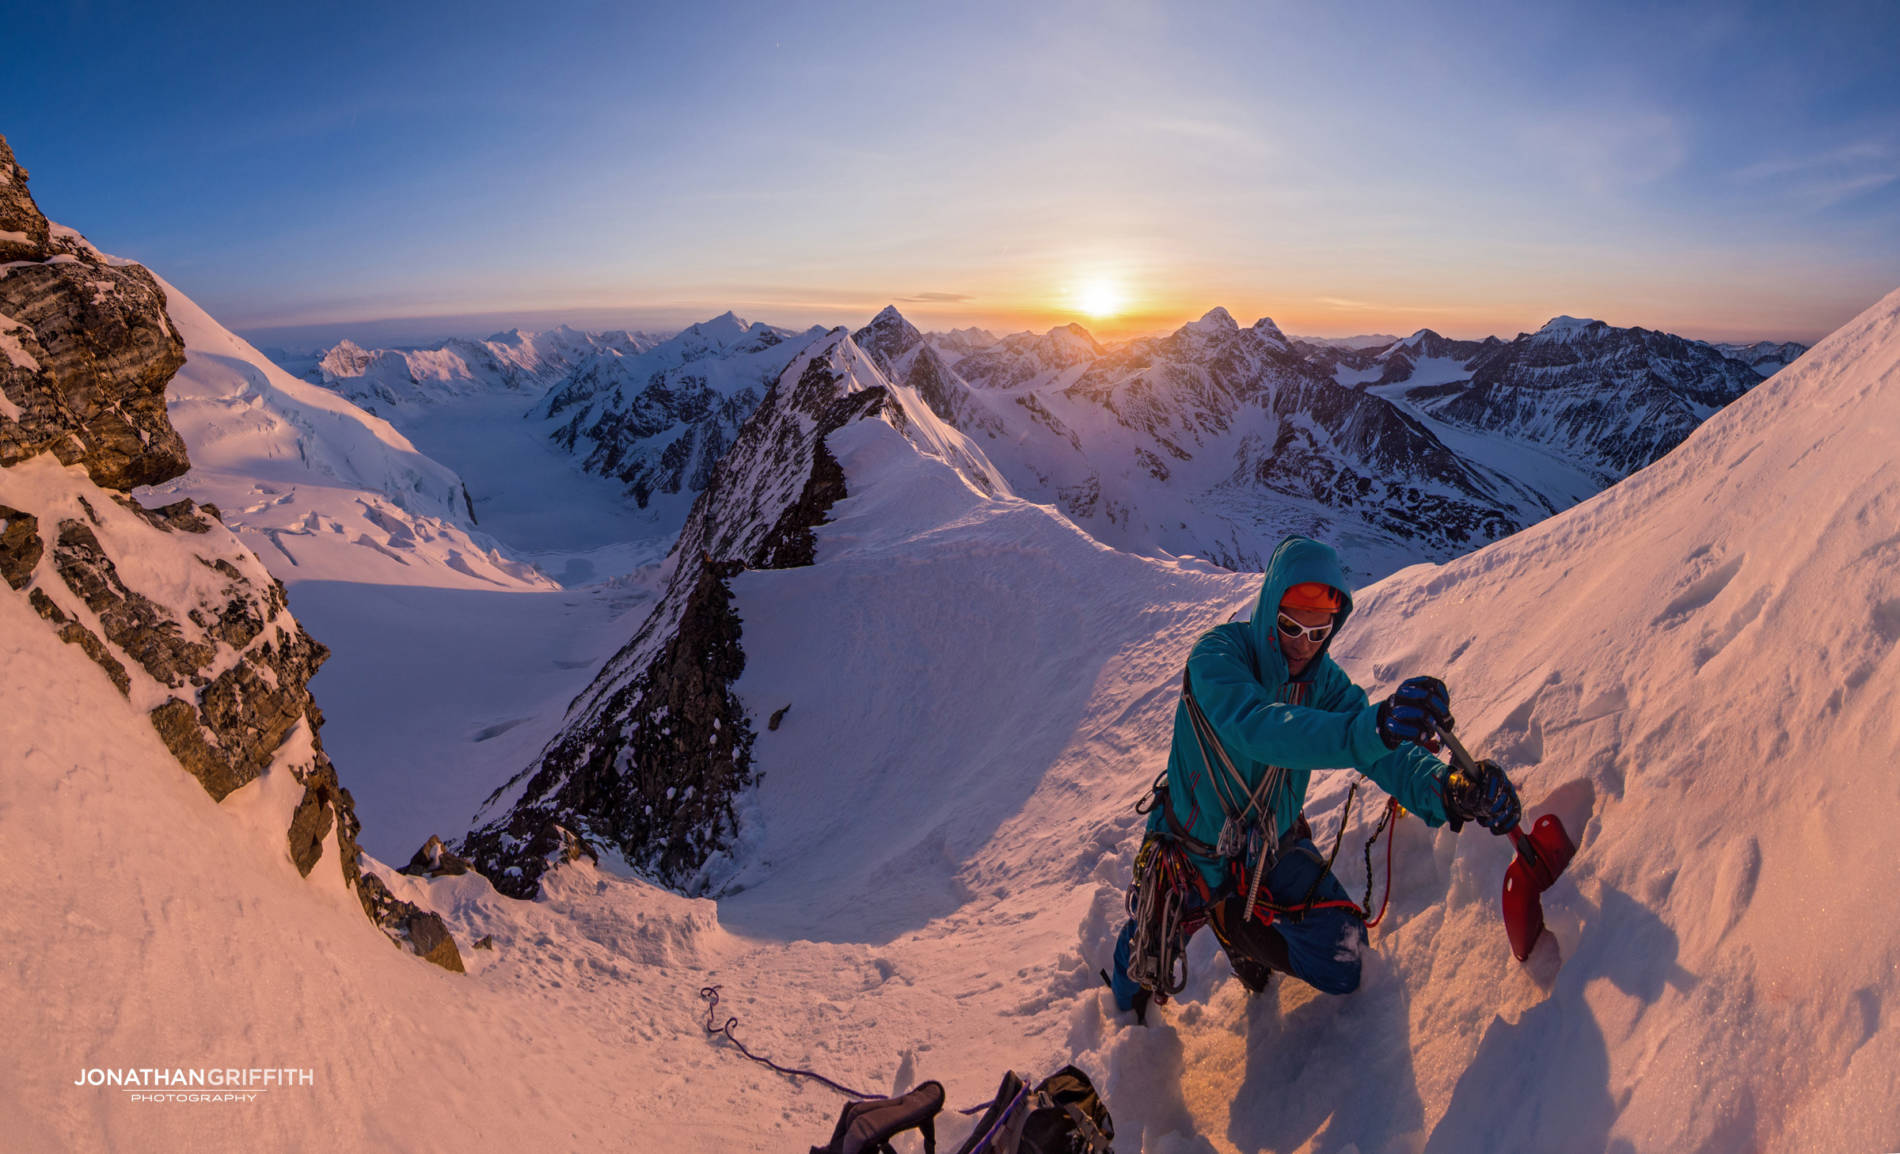
The thirds aren’t always necessarily obvious: here though I’ve got the subject and foreground in lower third, a middle layer of mountain backdrop in the middle third, and the top third takes in the very far landscape and sky
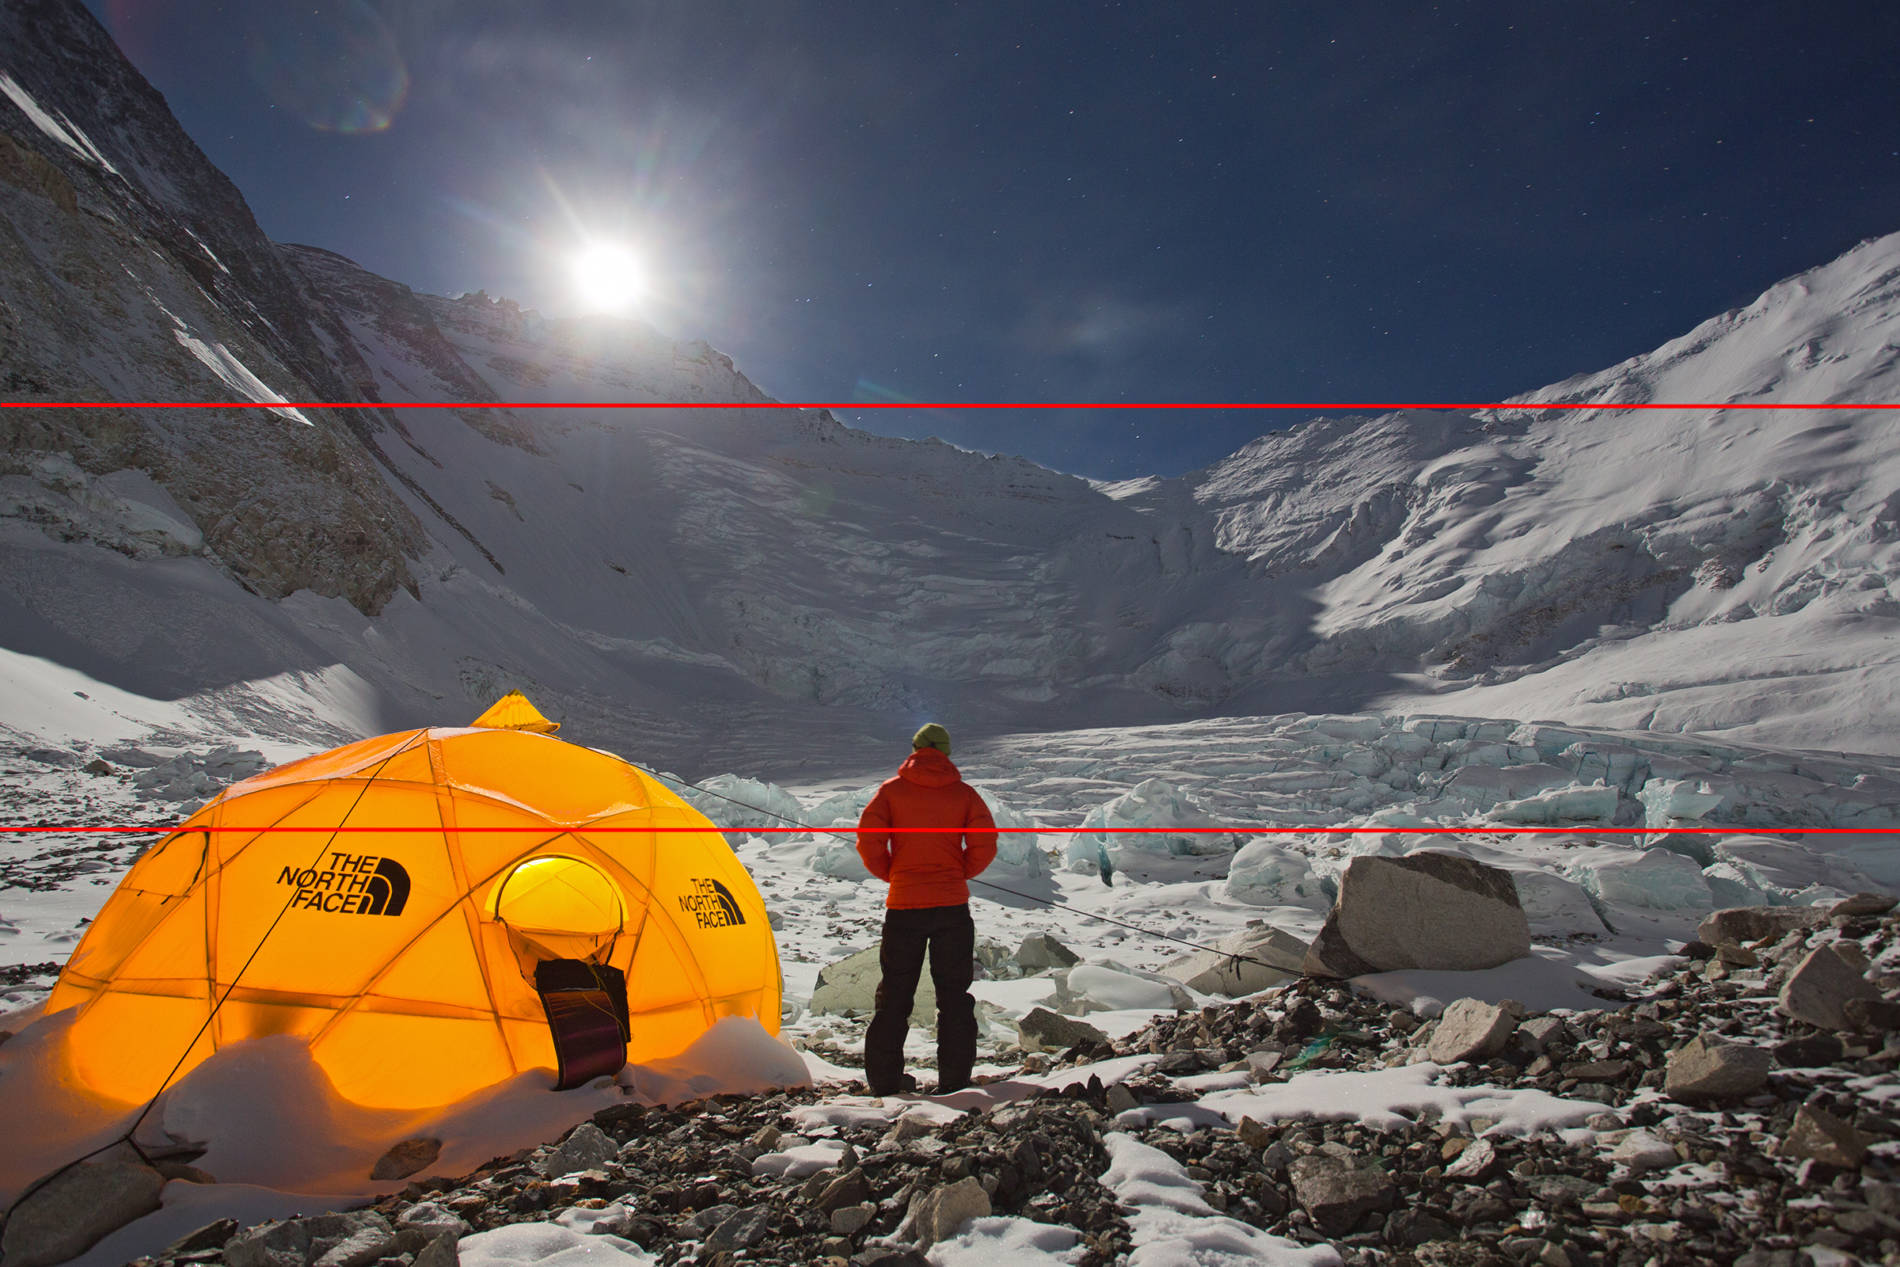
The ‘lines’ don’t always have to be flawless either as in this shot, just try and remember to keep things vaguely proportioned, its ok if some of it overlaps

As above there are overlaps but you can see how the mountain scene still flows a rough cut of the rule


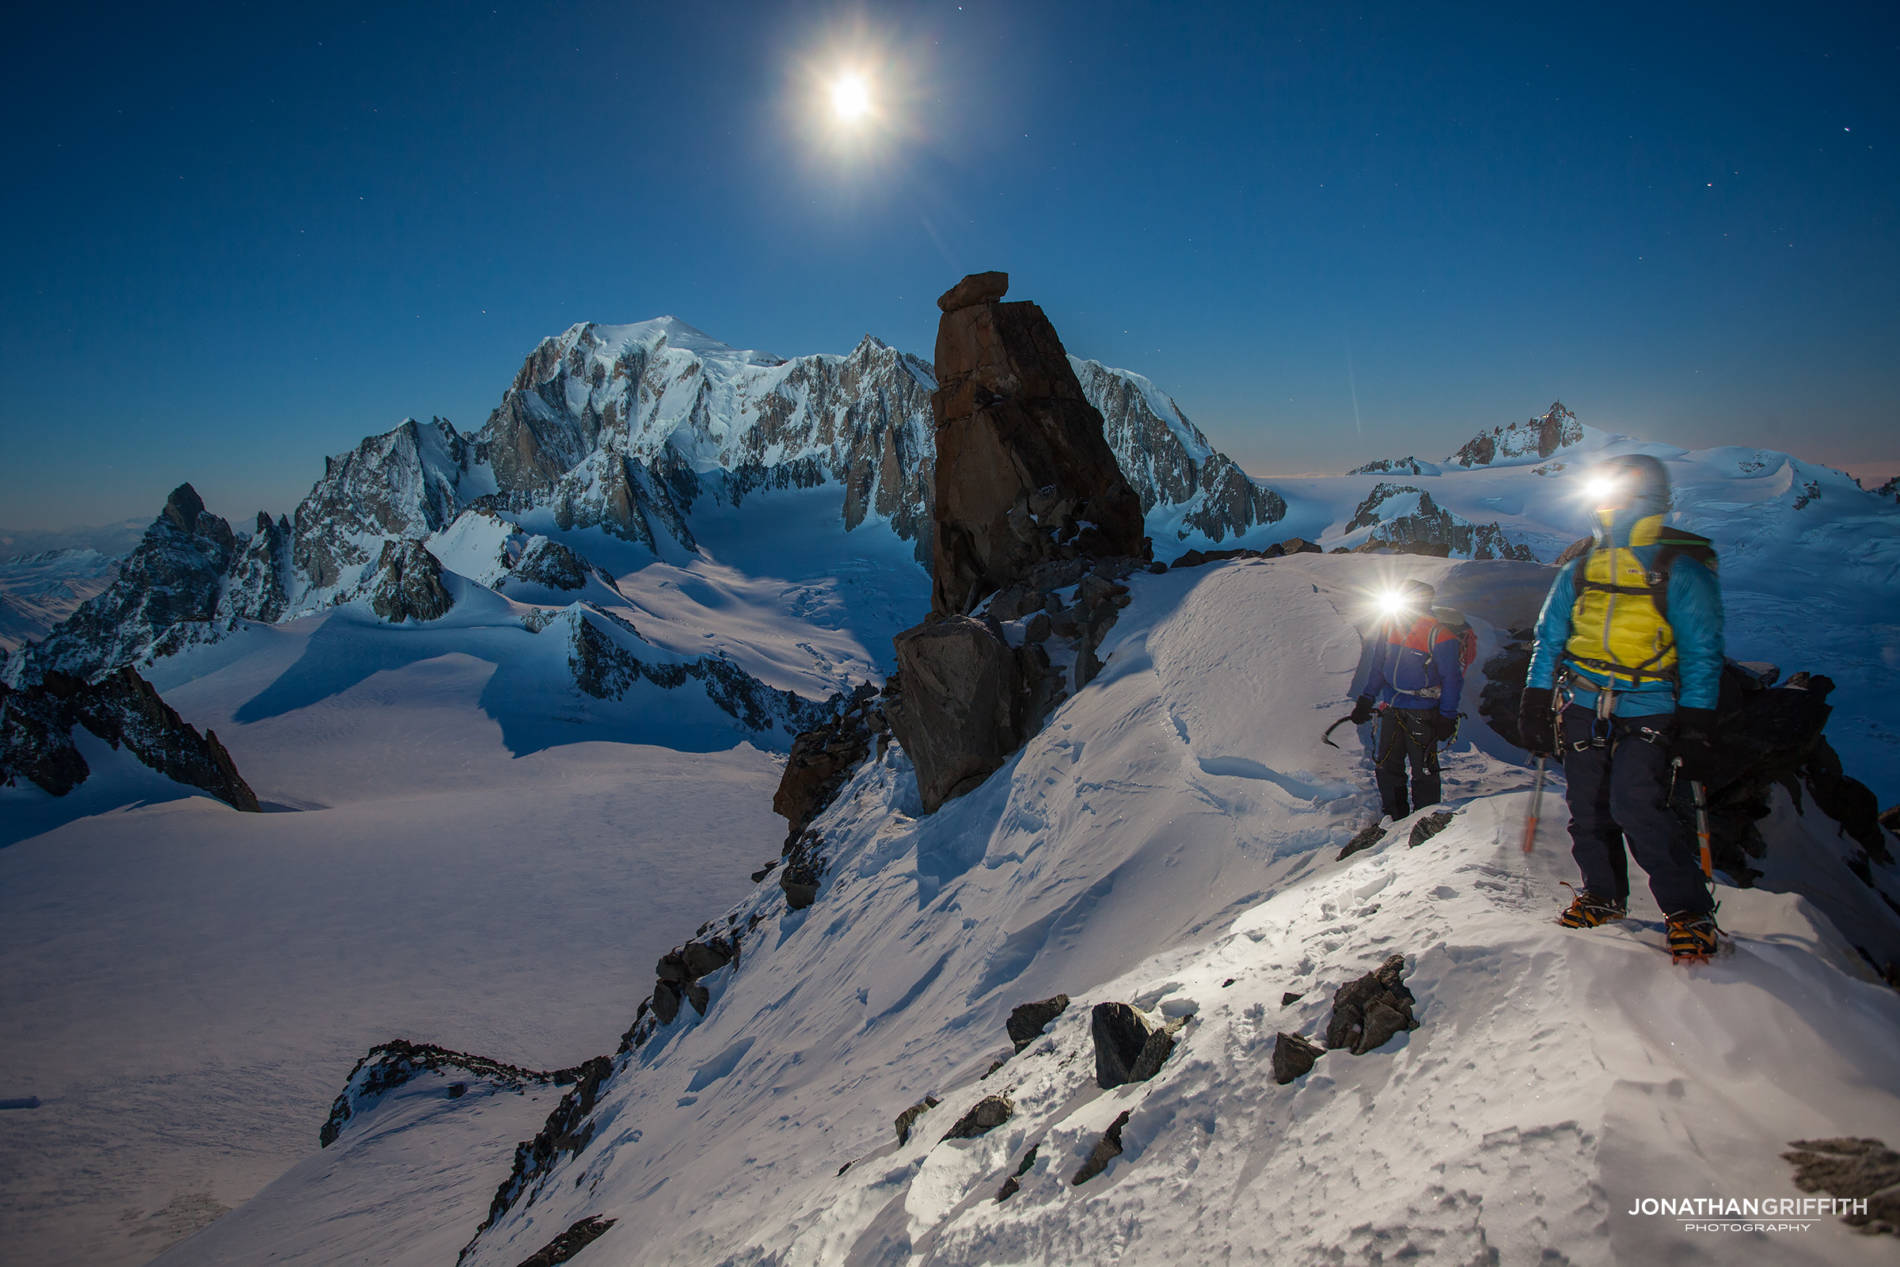
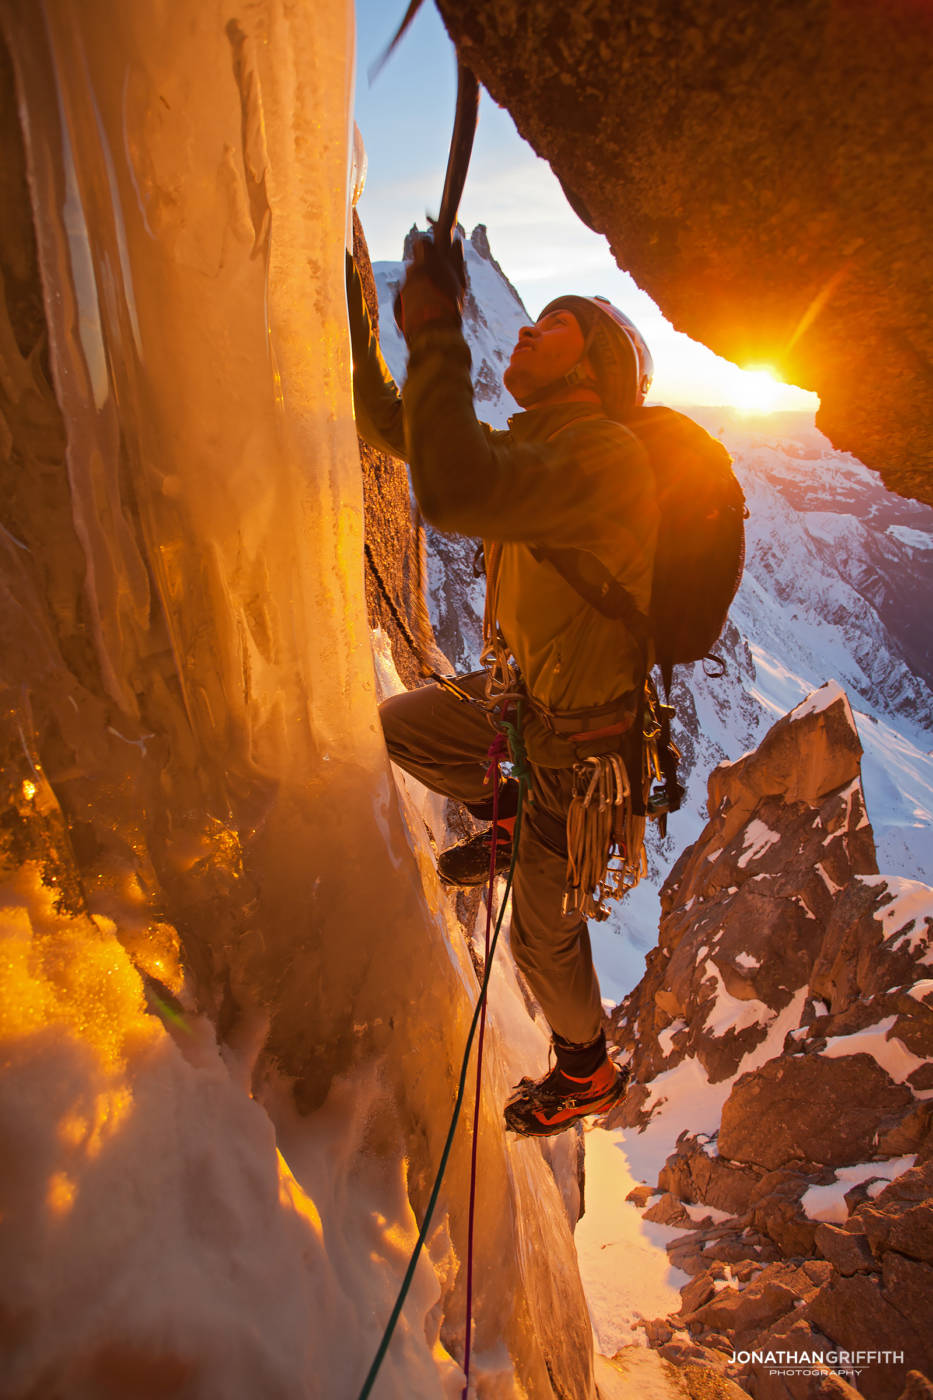
When you want to take it to the next level you can think in Rule of Nines. Try and have interesting stuff balanced out in each box- in there instance I’ve got the sun top left, the climber middle, and summit top right.

The Rule of Nine often helps to keep lines of interest in your image- try and balance the opposite part of the image with something interesting as well. In this case I’ve got the sun in the top left and I then want to keep the climber in the bottom right
Sharpness
I’m a stickler for keeping images pin sharp and for that you need to find the sweet spot of your lens. Every lens is going to be different but a simple Google search will tell you what aperture you should be shooting at to get the sharpest images. Don’t get too caught up in this though- the differences are minor. Just try and avoid shooting at either end of the aperture range and you’ll be fine. The image below shows varying F-Stops using a Canon 24-105 F4-22 L lens.

The original image

F4

F8

F11

F16

F22
Aperture and Depth of Field
I’m going to be using an imaginary lens of F4-F22 here
It’s important to understand how the aperture works on your camera, but don’t get too obsessed in it. Think of the aperture as being the iris of your lens- confusingly, the lower the ‘F-stop’ number the more open the iris is going to be. So an F Stop of F4 is the most ‘open’ my lens can go and therefore the most light it will allow in, conversely an F-Stop of F22 is the equivalent of the iris going as small as it can go and only letting in a very small amount of light.
Aperture affects two things Sharpness and Depth of Field.
Sharpness
The concept of Sharpness is pretty intuitive. As mentioned above there is a ‘sweet spot’ in every lens where you will achieve pin-sharp images for a certain aperture rating, just Google it. In my case my sweet spot is F8-11. As I move away from those values in either direction (towards F22 or F4) I start to loose sharpness in my images. If you want a visual aid then just open your eyelids as far as they will go and then squint- crude, yes, but you’ll notice that both extremes are not very sharp.
Depth of Field
Depth of Field is a little more complicated and takes experimenting out in the field to fully understand its effects. It is a lot easier to understand if you just call it Depth of Focus - the ability to have all the image in, or out of, focus. Don’t panic, 99% of your shots are always going to be fully focused across the whole image, but when shooting a subject very close up (a meter or so away), or when zoomed in to a subject you’ll notice that the background can be blurred out. You may want to keep that effect but if you want to have all the image in focus (extend the depth of field) then you’ll need to move the F-Stop number towards F22. The exact F-number depends on many factors and the only way to get to grips with it is go shoot outside and see the results.
Shooting very close to my subject means the background is out of focus

Increasing the aperture to F22 allows the background to be in focus
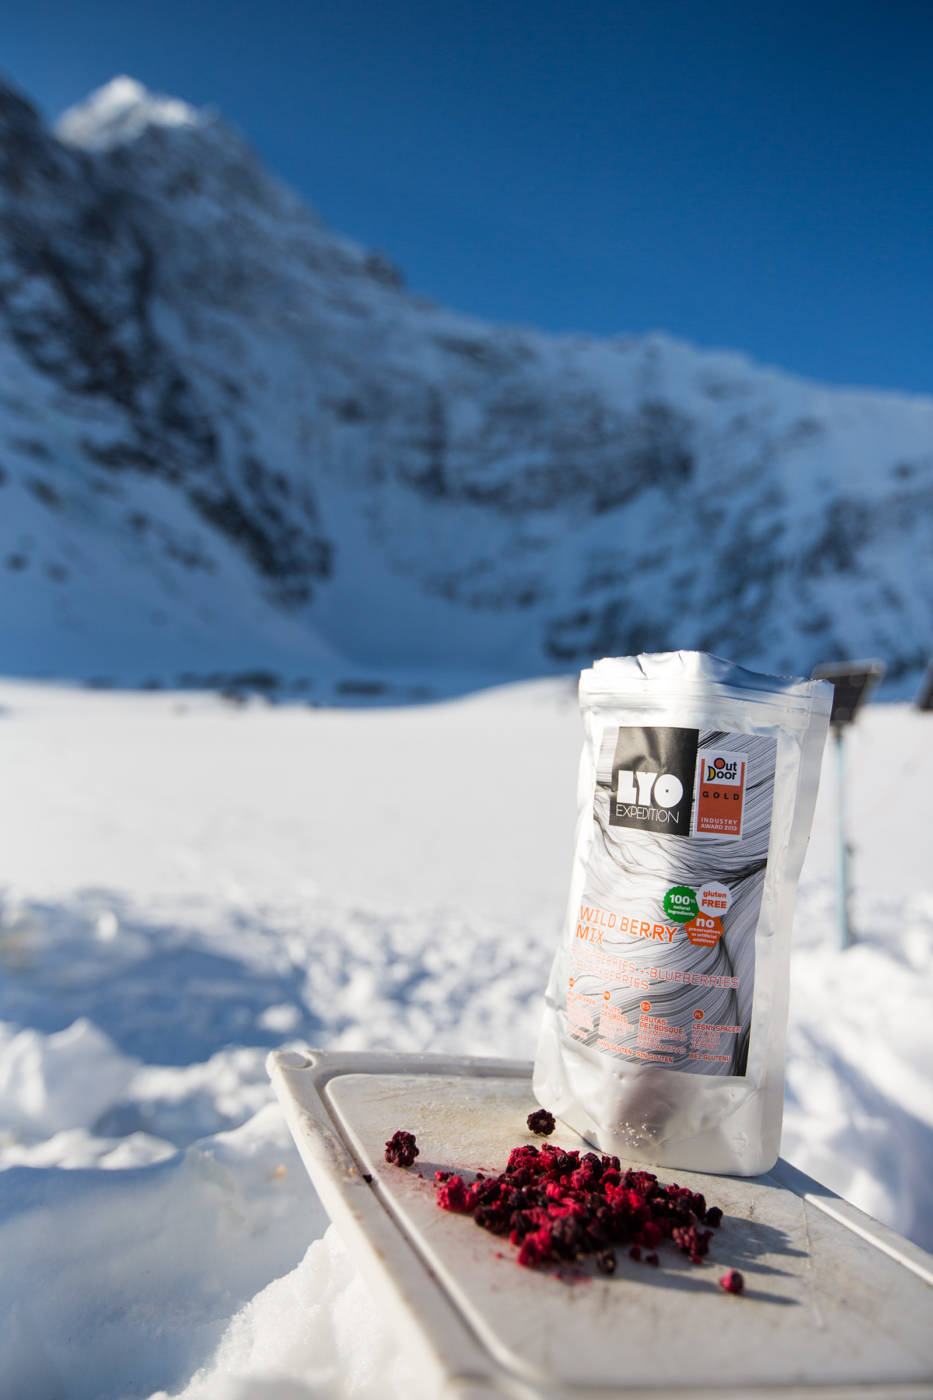
Using a shallow depth of field forces the opposite look and allows you to blur out the image around the subject you’ve focused on. It’s intuitive that if you need to shoot towards F22 to extend the depth of field, that you need to shoot towards F4 to use a shallow depth of field. Personally I think a shallow depth of field look is wasted in the mountains; you should never be afraid of showing where you are and when I see a very shallow depth of field I always get suspicious and think the photographer is trying to hide something. (Obviously if you are working as a professional and trying to single out a product then it’s a different matter entirely.)

Using a low value F-Stop allows you to blur out the part of the image around the focus point
As I said it’s important not to get too bogged down by aperture values, you’ll understand them better over time. Out in the field I always try and shoot as close to the sweet spot of my lens as possible for optimum sharpness - F8-F11 in my example. When I’m shooting in good light then I always prioritise the aperture. In low light situations I may want to give myself a bit more light and therefore I ‘open’ the aperture a bit, or when needed all the way down to F4. However I try and avoid shooting this low for sharpness reasons mentioned above and especially if I’m close to my subject and I risk shooting a shallow depth of field. I only shoot above F11 when I’m close to my subject and want to make sure that all of the image is in focus.
Finally if you want that sun star effect that everyone loves then a high aperture value is what you need. Please note though that for the sun star you need clear skies- even slight haze will ruin the effect.
ISO Film Speed
Back in the days of film this had a lot more importance than it does nowadays. The film speed, in modern terms, sets how sensitive the sensor is to light. The trade off is simple- a low ISO value means you have a smoother image (grain-free) but you also have to let the light hitting the sensor last longer (i.e. a longer shutter speed). If you’re shooting non-moving objects then this isn’t an issue but you can see how a fast shutter speed is necessary for freeze framing movement. Digital sensors get better and better every year now and you can easily get away with an ISO of 400 and above on a DSLR without noticing much difference. I sometimes finding myself trying to shoot as low as possible but really there’s no need- you’re better off in my opinion to shoot at the sweet spot of the lens than lowering the ISO. Obviously in really low light situations this changes completely.
Putting it all together
So you’ve vaguely grasped the ideas of ISO, Aperture, and Film Speed. It takes years to master all three subconsciously and automatically as you shoot so don’t panic if it all seems a bit overwhelming and confusing. However putting it altogether is what makes the very best photo you can take happen.
So where to start? Well this is how I would play things out, in order in my head.
The Alarm goes off
So its 4am at the bivouac and you’re feeling keen. Very keen as most people just want to eat and it’s colder than a witch’s tit- it’s grim so you know it’ll make a great memory. At this stage it’s pitch black but you’ve got a head torch to play with, use it! I’ll whack up the ISO to something like 1000 so I don’t have to worry too much about a blurred picture- after all you’re capturing a moment here not something you’re going to frame on your wall. Aim your head torch at the climber and set the aperture to as low as it will go, make it easy for yourself. Then ask your subject not to move and hold your breath and keep that trigger finger held down- the first one or two will be blurred but at some point in the next 5 seconds you’ll be solid as a rock and that will be enough to get your shot. Remember it’s not just you that’s got to be solid, but your subject as well. So don’t be afraid to take 10 shots in one go.

A pretty terrible first night’s sleep on No Siesta, Grandes Jorasses
Pre-Dawn
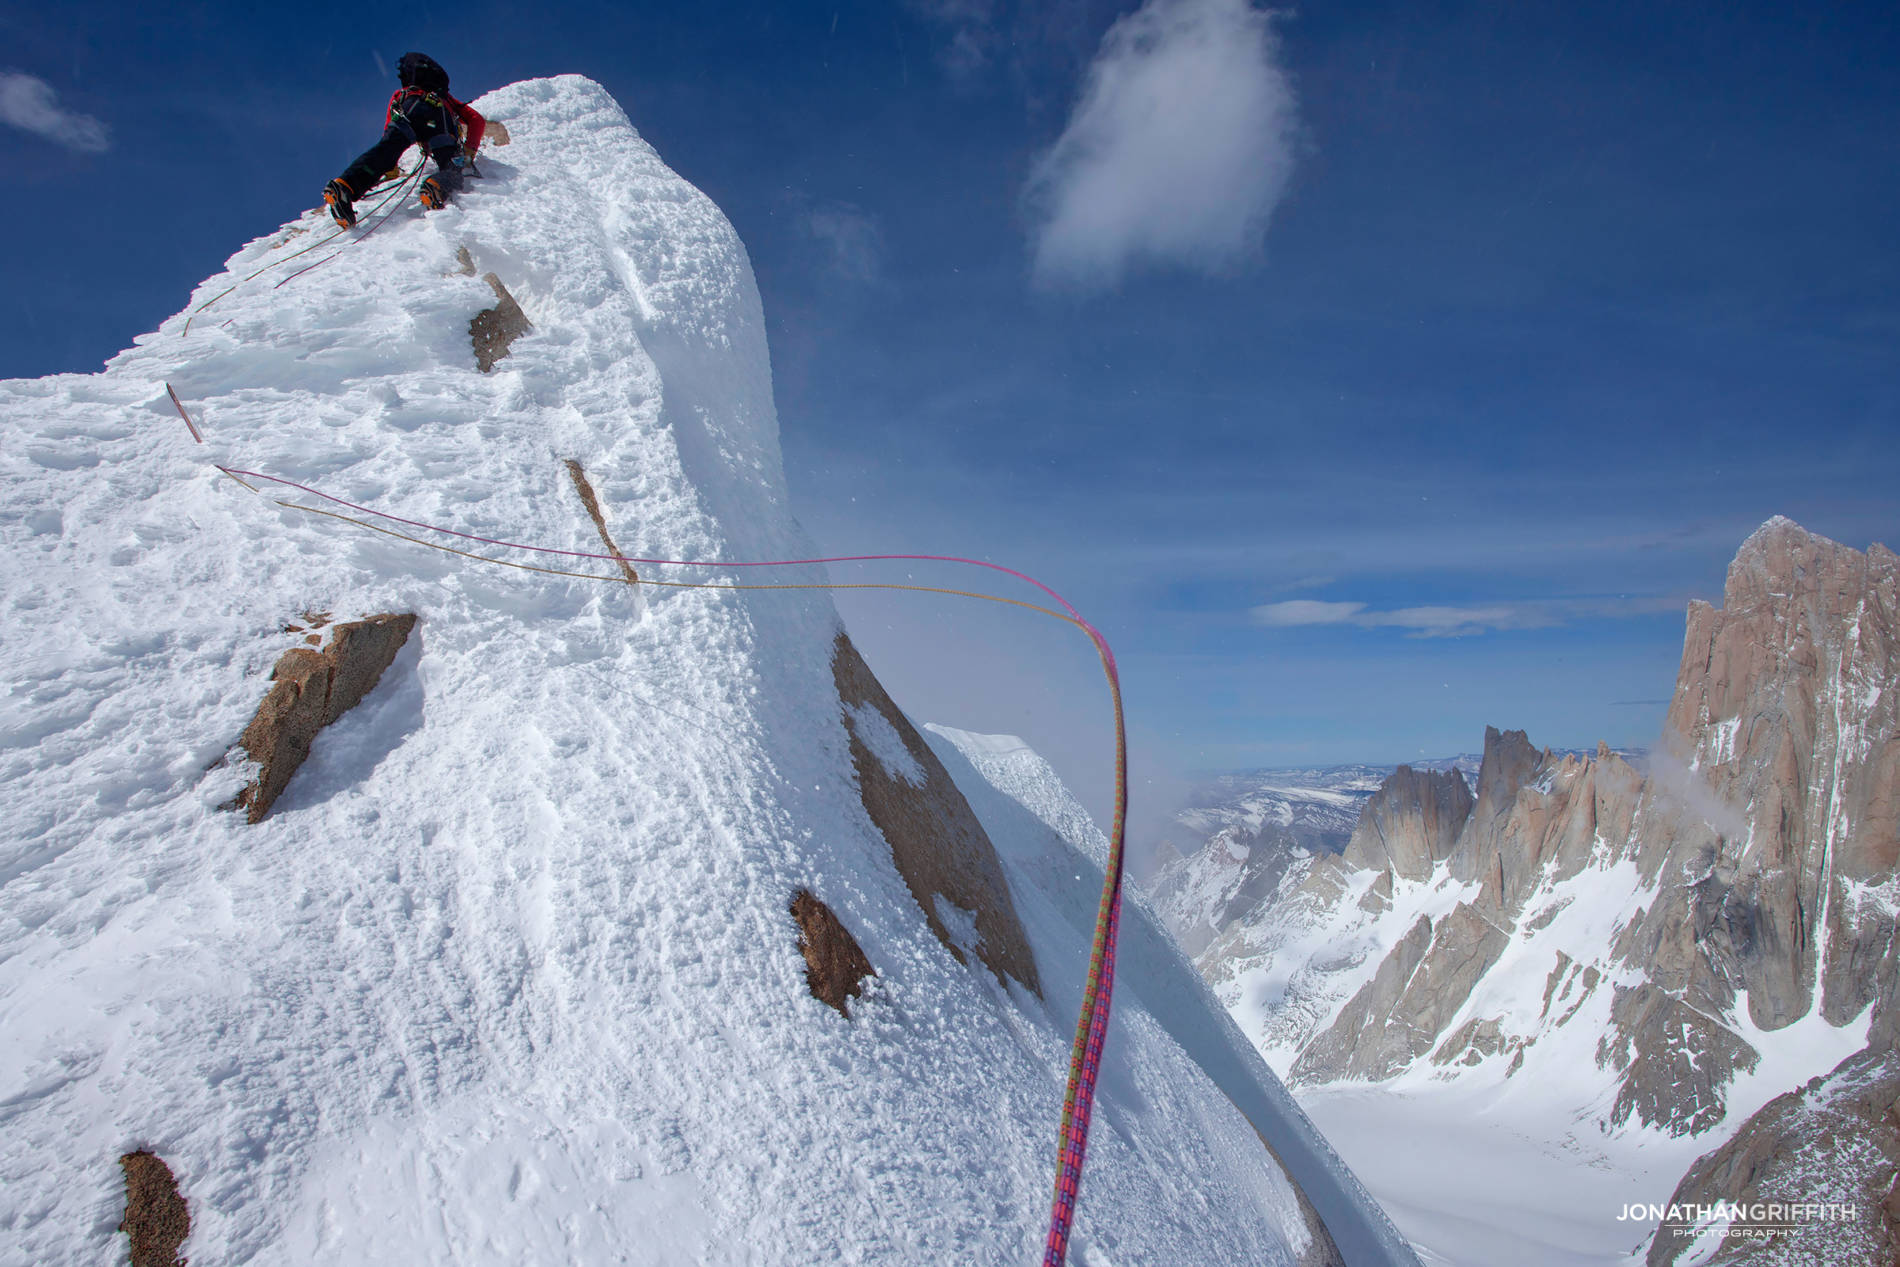
The stars are out, there’s a full moon in the background, and there’s not a breath of wind. It’s just you and your climbing partner high up on a beautiful alpine ridge; it’s a very special moment, and one you’ll remember forever. But it’s also cold and you don’t want to hang about. How do you get the shot? For this one you’re going to want to rest your camera on something. Don’t think tripod, just think natural features. As you’re climbing up look for rocks that have a good spot to sit the camera on, or if you’re carrying a big pack you can rest it on that. Remember that you want to get the shot done in just a few minutes here - partners have a very finite amount of patience. I tend to find a rock, get my pack off and sit the camera on it. Note that your camera will move as it ‘settles’ in to the soft rucksack and its contents. Stick the ISO as high as it will go- you need to frame the shot first (even through a viewfinder you’ll often find it hard to see in such low light).
Get your partner to stop and shine his head torch on the camera from a few meters away (or wherever he is)- you can then focus quickly on his head torch (much faster than focusing in the dark). Set your camera to manual focus so it doesn’t try and refocus later on when it takes the shot. Take a shot with the aperture at its lowest value- the photo will be terrible but remember you’re just framing here. If you need to angle the camera up then bundling up the camera strap and sticking it under the lens will help- you can use gloves or anything for this. Keep shooting until you find the shot you want. Now comes the trickier part. The easiest way to shoot low light is to choose the lowest aperture setting available and let in the most light- however I find shooting at the lowest setting unacceptably softens the image. Try instead going for an F-stop or two higher than the lowest setting, it will make all the difference.
Play with the ISO and aperture until you’re correctly exposed but be aware that shooting high ISO will result in a lot of noise in these kind of shots as there are a lot of dark spots in these photos. Again this is down to experience and what camera you are using.
Stick the camera on a 10 second timer delay and get ready to run! (Remember to have selected manual focus not automatic by this point). Leg it back to a suitable location within the frame and stand as still as you both can for 30 seconds (this tends to be the maximum cameras will expose for). 30 seconds is a long time but it’s perfectly doable, but remember that still means absolutely still!
Once the shutter has closed go back and zoom in on the image to make sure you are both sharp in the image, if not then repeat the image. With practice you’ll get it right first time every time and it shouldn’t take more than 5 mins to get the shot and be on your way again. Never be afraid to overexpose the image either!

Series of quick shots I took to get the positioning right: Photo 1

Series of quick shots I took to get the positioning right: Photo 2

Series of quick shots I took to get the positioning right: Photo 3
The finished product
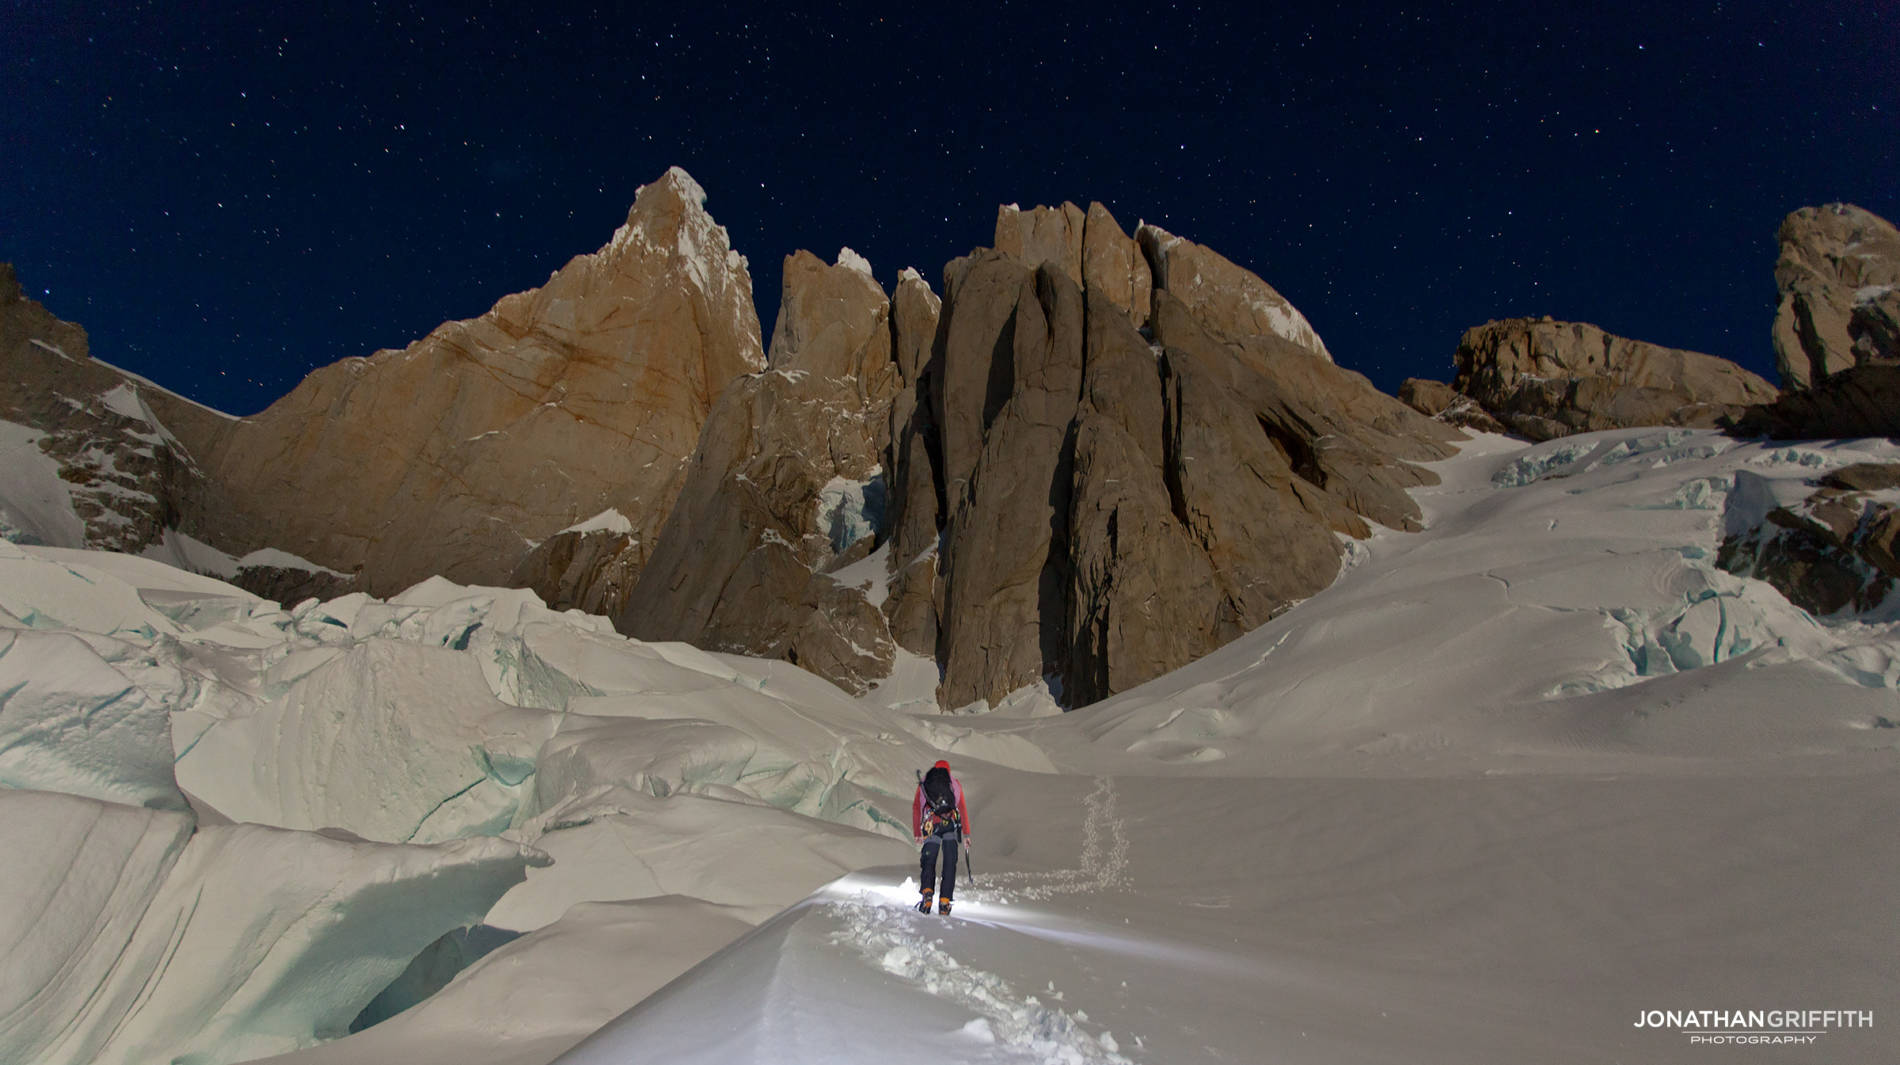
Another quick shot- taken on the walk in to the Cerro Torre massif, camera sitting on my pack. One shot was all it took- over time you end up getting it right first time every time

Another shot taken sitting on my rucksack, the key is for the subjects to keep very still. Ask your partner to get comfy, get in to a position where he doesn’t need to move
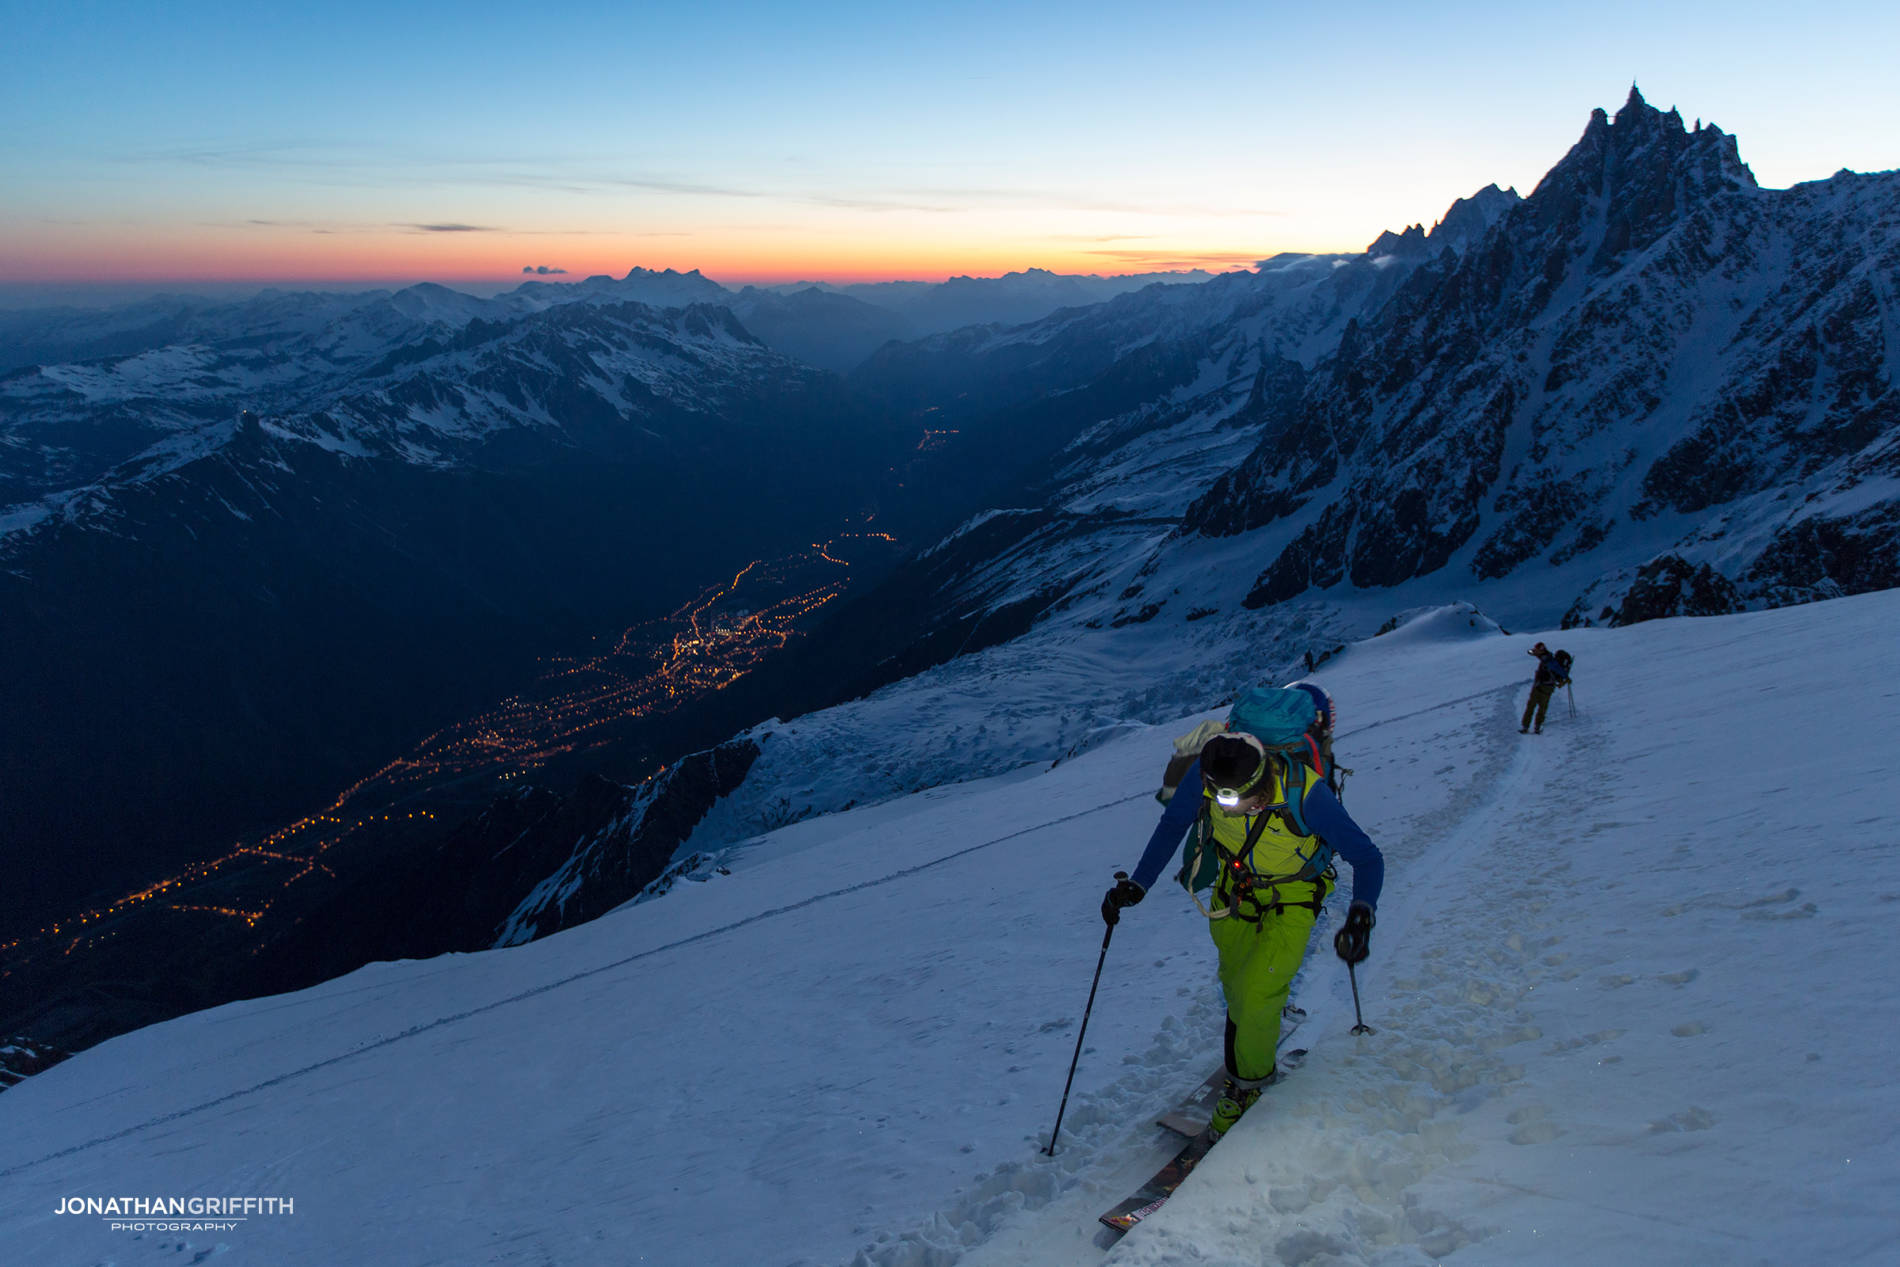
As dawn starts to break you can start shooting hand-held as well. This is obviously much faster. You can try resting the camera on your walking poles as well.
Another handheld shot- just take a few breaths and don’t breathe for the shot. Keep that trigger finger firmly pressed and take a few shots
Sunrise
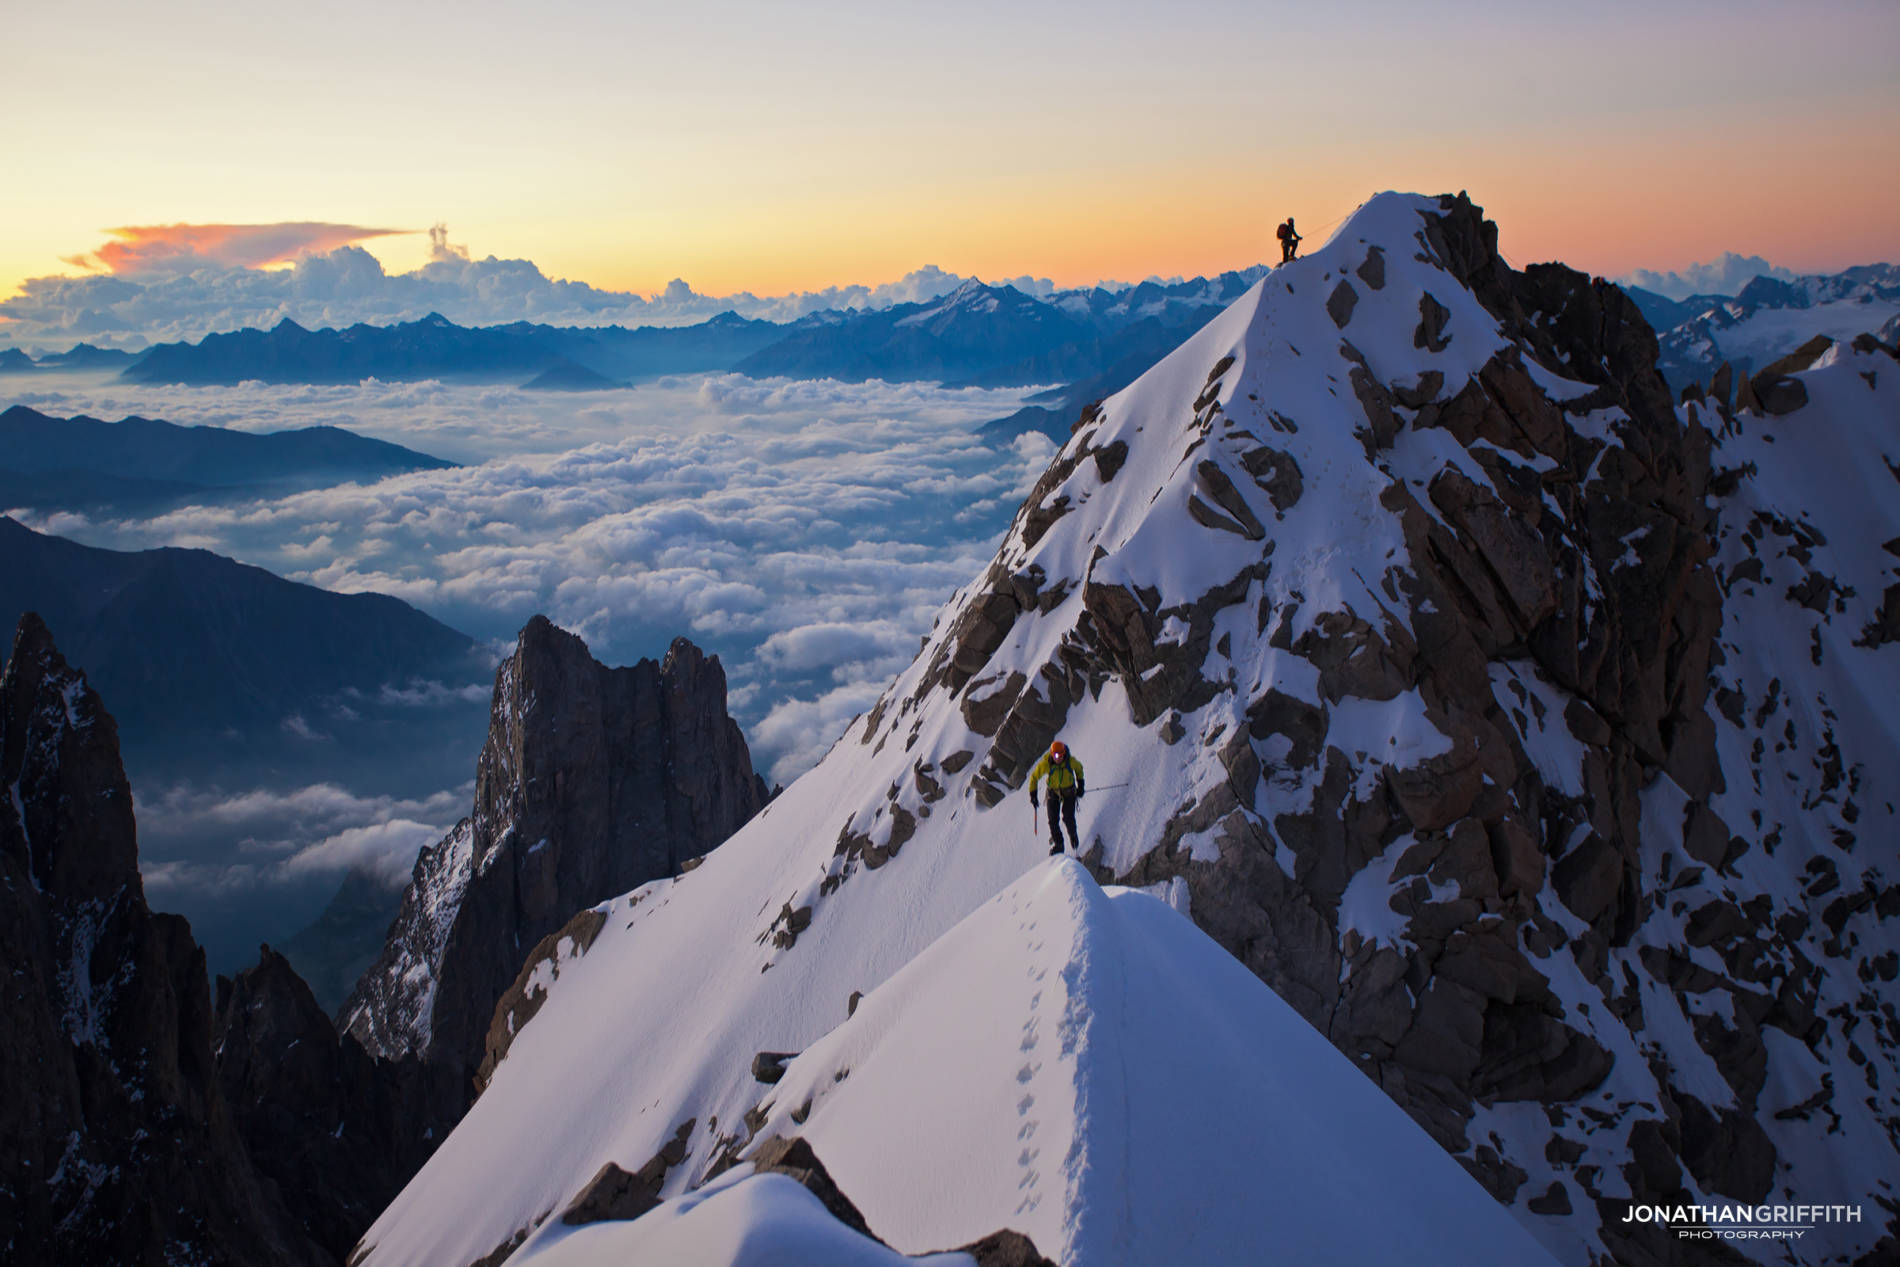
The alpenglow bathes the surrounding peaks and coats your climbing partner in InstaLike colours, only this time it’s not a fake filter and you’re starting to feel like you’re in a Rocky film, but how to capture the immensity of the situation? Well it would seem at this point that given the light from the sun you can shoot away without having to worry about how you’re shooting. Wrong. Sunrise may look bright to you but actually it’s not- you still need to manage your camera to avoid blurred images. I will still want to shoot at my maximum sharpness here or when shooting in to the sun use a starburst effect- so I’m already disabling myself by forcing a relatively high aperture value on my camera. For me the simple solution is just to bump the ISO up- I shouldn’t have any black areas in my shot that would develop noise, and it means that my shutter speed will remain relatively fast which is key. Sometimes I’ll have the ISO up to 600 or above for these moments, better to have a slightly grainy image than to come back with lots of slightly blurred images.
When shooting with a low angled sun in frame try and shoot a higher aperture to create a sunburst affect- you can go as big or small as you want on this one. But be aware if you’re shooting at an aperture of F22 you’ll need to massively over compensate with your ISO setting.
Remember that there are two movements in every photograph. You and your climbing partner. You may be standing still when taking a photograph but ideally you will want to capture your partner ‘in the act’ and that means he’s going to be moving pretty fast for your camera in those low light situations (even if you think he’s moving pretty slow). Don’t be shy - ask him to do the last few steps a couple of times to make sure you’ve got the shot, as well as ask him to walk slower through the motions. This is especially applicable if he is very close to you as movements will be accentuated.
Finally quantity is key here, keep that finger on the shutter button as no matter how experienced you are you’ll still come back with a lot of blurred images…that’s just life. After all you’re trying to push the ISO and aperture as close to the shutter speed limit as you can take pictures in, and that will always result in some throwaways.

Shooting with a dark background can be a little hard on the ISO (grain) so try and keep it low if you’re shooting something like this

Using a sunburst effect on the Aiguille Verte


Shooting a close moving object as well as a sunburst is hard to get right- using such a high aperture means the shutter speed will be pretty low. The key is to take lots of shots, one of them will come out!
Day-Time
The magic hour has been and gone but you’ve got a big shit eating grin on your face as you’ve got shots that would make your own mother weep for joy. You now enter the easy part of the day for photography- there’s so much light up here that you can stick the ISO way down to 100 and shoot at any aperture you want without having to worry about shutter speed. Be aware that in the winter months you can enjoy a relatively nice light all day long whilst in the summer time the sun is very high in the sky around midday and no amount of trickery is going to allow you to come back with stunning images in such harsh lighting. Go nuts, never see a shot and think you’ll get ‘another chance later’ - that literally never happens. Shoot now, you can always delete later.

Keep a look out for your partner, capture his body movements- it tells a good story
Shoot the weather- I’m not a fan of faked ‘rope swaying in there wind’ shots, but when it’s for real get it on camera

Keep a look out beneath you- chances are that in the Alps you’re going to surrounded by other climbing teams you can shoot

If the vista is big then shoot a panoramic image- don’t be afraid of showing where you are!

See anything unusual? Shoot it straight way- you may never get a chance to take a photo like it ever again

Bad weather is one of the best times to shoot for pure dramatic shots- wall to wall sunshine has nothing on big mountain storms. Get that camera out- it’s tougher than you are and will be fine in the snow

Try and be original, look for new and interesting angles
Sunset
If you’re unlucky enough to still be out on the hill at sunset and the only silver lining to that thought is that you’re about to shoot in the magic hour again, just remember to increase that ISO again and stick to the same rules as you followed at sunrise. Don’t forget that the mountains retain a very subtle light long after the sun has actually set- you can shoot some pretty spectacular images for a long period of time here. Use it and forget about the fact that it’s going to get dark soon and you’re still on the wrong side of the mountain.
A natural cave provided the perfect stance for this sunset shot
The weather can often be very dramatic around sunset, shoot it!
Everyone loves a bivy shot, be sure to shoot everything from digging out a platform to the actual bivouac

Keep an eye on the sun, it can sometimes have a nasty tendency of dipping behind a cloud on the horizon like it’s about to do now

At sunset you tend to be knackered, but get the camera out and shoot your partner looking exhausted
Exposure
You’ve made it home in one piece, you ticked the summit, and you’re about to sit down with a cup of tea and take the Instagram world by storm as you upload image after image of alpine-porn. Hell you even think this photography business is easy and might just quit your job as VP at Nestle, move to Chamonix, and do it full time. But as you start to download the images to your laptop you discover a disturbing amount of them are not exposed correctly, as your heart rate starts to rise, and the panic takes over you scan quickly over the thumbnails and discover that all the ones you had earmarked in your mind for front cover of National Geographic are all too dark or too light. Disaster!
Well actually this used to be a disaster but it turns out that technology is once again on hand to see us through our own incompetence and Photoshop is surprisingly good at converting a very badly exposed RAW image into a perfectly correctly exposed one without the image being a complete write off. Nevertheless it’s probably not going to make that front cover you just told your wife about over the phone.
Ideally you’ll get it right first time, or at least very close to right. You’ll notice that there are about a dozen or more exposure configurations on your camera (now that it’s been brought to your attention). You can expose for all the frame, part of the frame, a custom selection of the frame, and just about any combination you can think of- which is all well and good but shooting in the alpine puts us in very contrasting lighting conditions so you need to understand what the camera is doing here for you to understand how to shoot it properly. Sounds like a nightmare, well luckily through years of the above I’ve got a pretty easy workflow.

Too many options!
I select just the exact centre of my frame to expose (which also happens to be my focusing area as well). On my camera it’s a very small single square that only takes up about 1% of the entire frame. In the alpine world there are basically two things you’re looking to expose correctly- one is your partner and the other is the scenery around him. Given that snow is massively reflective, your partner less so, and rock even less, you’ve got to work out in your mind what you think is the ‘middle’ spot.
Personally I just focus on my partner or the very immediate surroundings. Keep it simple. In a nutshell you don’t want your partner to be a black silhouette but conversely you don’t want the snow or mountain scenery around him to be ‘blown out’ (i.e. too bright) so that you can see him.
If my subject is back or side lit, then I’ll expose on a spot on his body where there is sun hitting (a good balance between the bright snowy landscape and the dark sided part of the subject). Look at his helmet that will often have a glint of sun on it- I hover my little red square over that part and half depress the shutter button, that automatically locks in the focus and exposure. Then I can re-frame my shot and shoot away. The beauty of digital is that it allows us to see straight away how we’re doing- take a look at what you just shot. If its too dark then select and area of the frame that is a bit shadier and the image will lighten up- if its too bright then select a snowier area. A general rule is that you should always underexpose rather than overexpose- Photoshop does a better job of bringing out darker areas than it does in brighter ones.
Ideally though, by the time you’ve absorbed this article, you’ll be the next Ansel Adams mixed with Marko Prezelj so it’ll all be second nature anyways….good luck!

Remember it’s not all about DSLRs here, nearly every compact camera can be adjusted, © Andrew Houseman


